Tag: Tips and Tricks

  • Point domain from html site to WordPress site

    Point domain from html site to WordPress site

    These notes are a very pared down version of how to make a WordPress site in a subdirectory become the main domain site. I do this for my new client sites a couple of times a year. Perhaps not a full blog but more a jog, a memory jog (recipe) for the next time. Hope it helps anyone that does not need a long preamble.

    Scenario:
    Client has live html site (somesite.com)
    and a new WordPress website is ready to go in a subdirectory (somesite.com/aWordpressSite)

    Mission: Go-live
    Domain (somesite.com) should direct to WordPress site instead of the html site.
    Site visitor is unaware of the subdirectory AnotherWordpressSite

    Clear your head, think through, prepare:
    Read the WordPress Codex
    Read this nice post
    Read my post about 301 redirects. To make a list of pages use the Site Map Generator and download the urllist.txt.

    Take the steps:

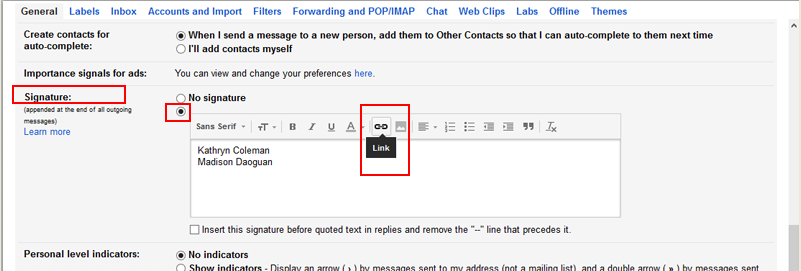
    1. WordPress Dashboard > Settings > General > Site address URL. Change your site’s root address (somesite.com).
    2. Copy (not cut) index.php file from the WordPress site (somesite.com/aWordpressSite/index.php) into the root directory (somesite.com/index.php)
    3. Edit that moved file to include the subdirectory (somesite.com/index.php)
      Check it 2 or 3 times to make sure you did it right:
      require('./aWordpressSite/wp-blog-header.php');
    4. Try viewing it
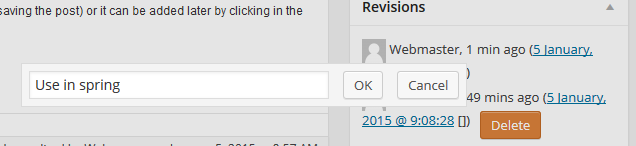
      • Not ok? Resave Permalinks (Remember Admin login URL does change)
      • Delete or change the name of index.html (remember to move the .html files to a new folder so they don’t get in the way)
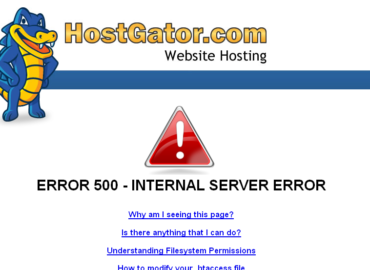
      • View site. Not ok? Move .htaccess to same place as copied index.php
      • View site – don’t worry, it will be fine now.

    SEO

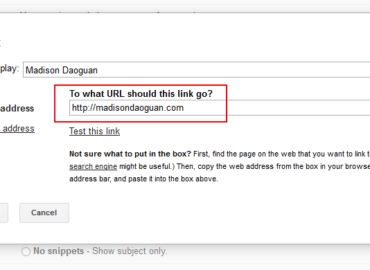
    • Set up redirects for old pages.
      The old pages are going to bounce to 404 error page so set up 301 redirects for a better user experience (see 301 redirect troubleshooting, .htaccess invisible in Dreamweaver )
    • Turn on SEO plugin if it is not already active.
      Other plugins to check on while in the neighborhood: Backup and Security.
  • How to delete post and page revisions (and arrange edit view)

    How to delete post and page revisions (and arrange edit view)

    2019 update: Thin Out Revisions plugin discussed here has not been tested since version 4.2 so I can no longer recommend it. There are WordPress settings and plugins (Optimize Database after Deleting Revisions) that will delete “all revisions” prior to a certain date, but not a plugin where you can choose which revision to delete. I’m sad about it since some clients cyclically revise content and causes more revisions to be saved then need be.

    Debwork clients can delete revisions to keep their sites smaller for backups, and there are some claims that loading time is faster. If you can already see the revisions box on your edit view, skip section “How to: delete post and page revisions”.  The first part of the article explains how to show / hide edit boxes on your edit page view.

    Arrange edit view in WordPress

    WordPress allows each user to arrange the edit window for both pages and posts per their preference. Sometimes after software updates, preferences get “reset” so it is good to understand how to do-it-yourself even if if you want your webmaster to set up your WordPress page view. Each feature you can edit is in a box.

    The following are under your control:

    • Hide/ Unhide boxes
    • One or two-column layout
    • Move boxes around
    • Toggle boxes open and closed

    #1 How to: show or hide WordPress edit feature boxes & columns

    • Go into a post or page that has been published for awhile.
    • In the upper right corner by your name, click on the “Screen Options” tab. This toggles everything available on the edit page.
      screenshot of screen options tab on wordpress edit window
    • Check and uncheck boxes to show or hide them. Debwork clients should turn on “Revisions” (more on that below)
      screenshot of opened screen options tab. boxes can be checked to show or hide edit boxes in wordpress
    • Note that you can also have a single column view or a 2-column view which is the default.

    #2 How to:  move boxes around

    • Hover your cursor in the corner of an edit box (see featured image at the top of this post)
    • The cursor changes to a cross which tells you  you can click and drag the box to wherever you prefer. For example, you  might want SEO edits right under the primary edit window to remind you to address SEO titles and descriptions each time.

    #3 How to: toggle features opened / closed

    • If a feature is rarely used , it can be “shown” but made less obtrusive by clicking the gray arrow in the upper right corner of the box.
      edit-page-close-toggle

    How to: delete post and page revisions

    Debwork DIY clients can delete their own revisions to keep their sites smaller for backups. The plugin Thin Out Revisions provides this function.  Use the instructions above to show the revisions box on the edit page if it is not already showing. Suggested place to tuck the delete revision edit box is at the bottom of the right column.

    screenshot of the area on in wordpress where you can delete old revisions to keep site smaller for backupsTo delete a revision,

    • Choose the revision to delete, click  the delete button.
    • WAIT for it to finish before deleting another.
    • Click OK
    • Ignore the opportunity to “prevent this page from displaying additional dialogs”

    How to: add a note to your revision

    Using revision memos makes it easier to revert back to something that might be used again and also indicates to think twice before deleting.  If you think you will go back to certain revisions, be aware of the ability to add revision notes.

    Example: some sites have seasonal page displays “spring semester”, “winter semester”
    Example: some sites have displays of a page for when they are away “on vacation”, “off vacation”

    Click the [] brackets after the revision, and a window will appear to add a revision note. Click ok when done.

    screenshot of the brackets. click this to add a change note. WordPress Revisions

    click the brackets to get revision memo edit window


  • Portfolio Picture order in Strikingr Theme (one experience)

    Portfolio Picture order in Strikingr Theme (one experience)

    Striking Mutliflex theme is fantastic (see sites used) but I had a problem figuring out how to get images in the exact order preferred by the website owner.

    Wanted:

    Exact placement of pictures in portfolio display

    Parameters at play:

    • ids select items on id basis comma seperated (optional)
    • orderby : no, page, author, post-id, title, date, random, parent-id, nr of comments, modified date (optional)
    • order : DESC, ASC (optional)
    • (for full list see Striking shortcode documentation)

    Shortcodes that did not work.

    Striking theme order number for portfolio display

    #1 Order By Page Ascending:

    [portfolio sortable="false" cat="rings" current="rings" height="180" column="4" title="false" desc="false" more="false orderby="page" order="ASC">]

    The idea for this is to add an order number (sometimes referred to as “page order number” in the Portfolio Item. It looks like this:

    Aside Suggestion: use increments of 10 when you first set it up so it is easier to change the order later.

    #2 List of id numbers in the order desired:

    [portfolio sortable="false" cat="rings" current="rings" height="180" column="4" title="false" desc="false" more="false" ids="237,248,275,266,267,249,252,265, (etc)"]

    Striking shortcodes that did work:

    #1 Fix for order by page Ascending:
    Remove the parameters orderby=”page” order=”ASC”! (I don’t know why but now it works)

    [portfolio sortable="false" cat="rings" current="rings" height="180" column="4" title="false" desc="false" more="false"]

    #2 Fix for List of id numbers:
    There is no problem with the shortcode I used but the misconception is that it displays in the order written in the shortcode. The ids list is “what to include” but does not dictate the order so the attribute “order” works in conjunction with the ids list. Of course if the list of ids is the entire category. This is just extra work.

    [portfolio sortable="false" cat="rings" current="rings" height="180" column="4" title="false" desc="false" more="false" ids="237,248,275,266,267,249,252,265, (etc)"]

    Here is the help forum discussion on this topic. We were having a small communication difficulty so I wrote it up my findings here.

    Link to where you can purchase Striking
    btw I’m not getting anything out of recommending it, no residual deals here.

  • BackupBuddy Error #8329754  ERROR_EMPTY_FILE NON_CREATE_MODE

    BackupBuddy Error #8329754 ERROR_EMPTY_FILE NON_CREATE_MODE

    There is no error #8329754 documentation on BackupBuddy but here is what worked for me:

    The Problem:

    Error #8329754. Error retrieving fileoptions file `..wp-content/uploads/pb_backupbuddy/fileoptions/m5g6068f4h.txt`.

    Error details `ERROR_EMPTY_FILE_NON_CREATE_MODE`. Error information & troubleshooting:
    http://ithemes.com/codex/page/BackupBuddy:_Error_Codes#8329754

    How nice of BackupBuddy to give us an error page – too bad it is not found.

    This worked for me:

    • Deleted 2 cache plugins (they were already deactivated but sometimes deleting helps)
    • Updated BackupBuddy plugin
    • AHA –  the license info was missing because I had changed plans – fixed that!

    Thus and so the problem might just be no license or it might have been a conflict with one of the cache plugins. Either way it’s bad form to not help us out. iThemes must know what is going on here.

    The backup was totally smooth after that.  Good Luck

  • How to Add or Update Email Signature Gmail

    How to Add or Update Email Signature Gmail

    By request from a web client, here is how to update or add an email signature with a text hot link (hyperlink). If you would like an image link in Gmail, it is not hard but Gmail adds an annoying border around it. Here’s my trick on how to get rid of that.

    1. Log into Gmail
    2. Hover over the gear link in upper right and choose Settings:
      How to get started with Gmail Signature gear then settings
    3. Scroll down to Signature section.  Click the radio button to enable signature
      Compose your signature.
      Highlight what you want to be a link and click the link button (click image below to see bigger):
      Where to find the link button in Gmail Signature
    4. Add your URL  and click OK
      Where to put in the URL for a hotlink in Gmail Signature
      1. The text should now be underlined.
        If you do not want two dashes before the signature click the box underneath too.
        How the link should look before you save it Gmail setting signature
    5. SAVE the signature at the bottom of the page
      gmail setting save button
    6. Compose a new email – your signature should be showing..
    7. To DELETE the signature, click the “No Signature” radio button, your work will be saved until when you want to use it again.


  • Display side and footer widgets in mobile version Elegant Themes

    Display side and footer widgets in mobile version Elegant Themes

    Elegant Themes are wonderful but Epanel does not provide an option to display or hide sidebar and footer widgets for mobile. The default is to hide so you have to figure out how you unhide them each time you use a responsive theme by Elegant.

    Add this to your CSS:

    /* display sidebars and footer in Nimble or Trim theme  */
    @media only screen and (max-width: 767px){
    #sidebar, #footer-widgets {
    display: block !important;
    }
    }
    @media only screen and (max-width: 479px){
    #sidebar, #footer-widgets {
    display: !important;
    }
    }
    /* end display sidebars for Elegant themes */

    Here is the support post answer for Nimble theme: Keep Widgets on Mobile Site

    Above I added  !important for both and for 767 portal added #footer-widgets.


  • How to make Adobe Pro default instead of Reader on Windows 8

    How to make Adobe Pro default instead of Reader on Windows 8

    If you landed here it is because you have tried

    • Explorer > right click on .pdf file > set default to Adobe Pro
    • control panel > default programs > .pdf > set default to Adobe Pro
    • swipe right edge > settings >change PC settings > search and apps > defaults > choose default > change to Adobe Pro

    You have looked at videos and http://windows.microsoft/en-us/windows-8/choose-programs-windows-uses-default

    All that (and more) – and it DOES.NOT.WORK.

    Answer is – Uninstall Adobe Reader App that came with your computer. DONE!

    • It will not affect your web browsing for .pdfs and it will allow Adobe Pro to be the default.

    Yeah, It doesn’t seem right to uninstall a newer app but if you want your documents to open in Pro, this tip will get it done.

  • Gravity Forms First Last Name Fields in Separate Lines

    Gravity Forms First Last Name Fields in Separate Lines

    In a widget, Gravity Forms name fields need full width

    How do you get first name and last name to be vertical instead of horizontal? When you are integrating with a mailing list you must have the advanced name field to map to MailChimp’s or AWeber’s database.

    Gravity forms premium support is fantastic but sometimes you don’t want to ask for help, so here is the CSS for first name and last name in a sidebar widget. The change will apply to ALL forms,  to apply to a specific form change .gform_wrapper to something like #gform_wrapper_1. Gravity forms applies a number to each form.

    .gform_wrapper .ginput_complex .ginput_right {
    float: none !important;
    width: 100% !important;
    }
    .gform_wrapper .ginput_complex .ginput_left {
    float: none !important;
    width: 100% !important;
    }

    In a widget, the email address is also too narrow in this form. To make the email field 100% width for Gravity form number 2 only (change to your form’s appropriate number):

    #gform_2 .ginput_container input.medium {
    width: 95% !important;
    }

  • How to Delete a WordPress site without Fantastico

    How to Delete a WordPress site without Fantastico

    Hostgator used to have Fantastico and now they have their own tool called QuickInstall. If you try to delete a WordPress install, the new tool does not recognize your website installed with Fantastico.

    Here is the best YouTube I found to simply explain How to Manually Delete a WordPress Site because Fantastico is no longer available for the most part.

    A few words from a forum about QuickInstall on Hostgator.

  • Hostgator PHP update to 5.4 gives Internal Server error 500

    Hostgator PHP update to 5.4 gives Internal Server error 500

    Some WordPress plugins require you to advance your website from 5.2.xx. If you don’t you might get the WHITE SCREEN OF DEATH which is harrowing.

    Hostgator’s Support site (this page)  gives the advice to modify .htaccess as follows:

    “PHP 5.4 is available on all Shared and Reseller hosting accounts by adding the following code to your .htaccess file:”

    • # Use PHP 5.4
      AddType application/x-httpd-php54 .php

    This works about 50% of the time and the other sites give Error 500 INTERNAL SERVER ERROR. yikes!

    To upgrade then requires an online chat call with Hostgator. They are awfully nice about helping with it.  But today I was told that PHP 5.4 is NOT on all servers. If you try installing 5.3 instead you might have better luck and avoid the 20+ minutes a chat session can take.

    • # Use PHP 5.3
      AddType application/x-httpd-php53 .php

    Where do you put that? At the top of the file will do nicely.

    It’s odd that one of my NEW clients – installed in 2013 – was running on 5.2 – kind of disappointing, ‘gator.

    BTW for Bluehost you can update via php.config but that’s another story.